
Applicable to ENA v17.0 P08 upwards
Prerequisites to setting up Meraki Webhooks in Entuity
To set up Meraki Webhooks in Entuity
To enable or disable a webhook
From ENA v17.0 P08 upwards, Entuity provides support for customer-defined events within the Entuity Event Management System (EMS) via the Meraki Webhook. This enables Meraki Cloud Controllers to send you alerts via webhooks.
Prerequisites to setting up Meraki Webhooks in Entuity:
The following are mandatory prerequisites to setting up Meraki Webhooks in Entuity:
- You must configure the Entuity server for SSL operation.
- The Entuity server must be reachable from the internet.
- An inbound rule on the firewall must be configured to allow inbound traffic on port 443 from the Meraki dashboard to the Entuity server.
To set up Meraki Webhooks in Entuity:
- Add a Meraki cloud controller device as a managed device. Please see this article for help and information on how to add a Meraki cloud controller.
- Navigate to the Webhooks page (Main Menu > Administration > Webhooks).
- In the table on this page, select the Meraki cloud controller that you added above.
- Click Generate Key. This will generate a secret key for this Meraki cloud controller.
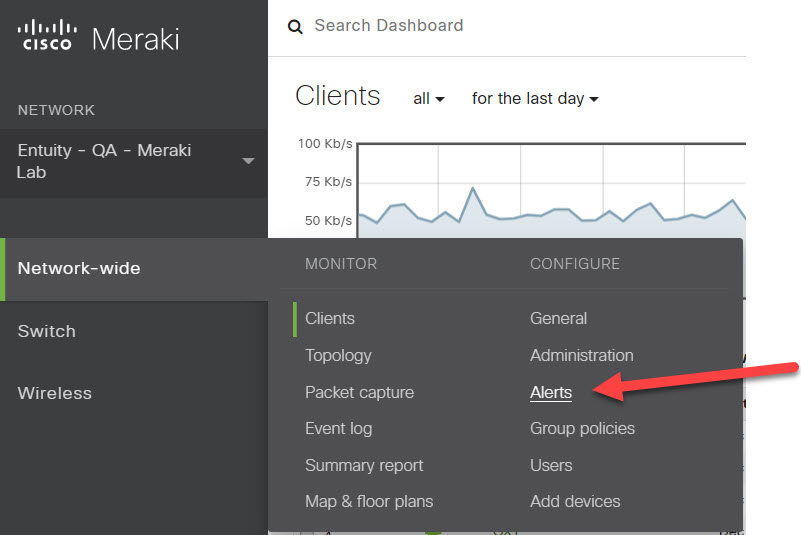
- Navigate to https://meraki.cisco.com/ and sign in to your Meraki web portal.

- This will take you to your Meraki Dashboard. Navigate to the Alerts configuration page.
- Scroll down to the Webhooks section of the Alerts page. Click Add an HTTP server to open a new line in the table. Enter the Name, URL (click Copy URL on the Entuity Webhooks page to copy the URL of the Meraki cloud controller on the Entuity server) and Shared secret (Copy Key on the Entuity Webhooks page).
If the Entuity server is known by a different hostname/IP address from the cloud controller's perspective, you can manually edit the URL field to reflect this.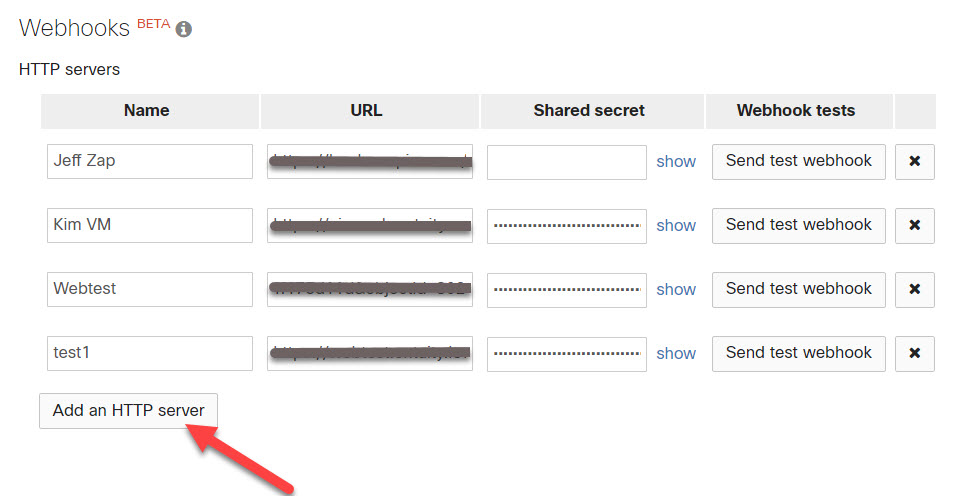
- Scroll up to the Default recipients field and specify the webhook to which notifications will be sent. For example, if your webhook had the name 'test1', then in the Default recipients field you would type 'test1'.
- Specify the types of alerts that you want to raise by ticking the appropriate boxes in the Network-wide, Wireless and Switch sections.
- Click Save at the bottom of the page to save your changes, otherwise click Cancel. Please allow for 1-2 minutes for your changes to take effect.
To enable or disable a webhook:
- Navigate to the Meraki Webhooks page.
- Select the webhook that you want to enable or disable.
- Click Enable/Disable either via the button at the top of the table, via the right click Context Menu, or via the table's Overflow Menu.
- This will open the Enable/Disable Webhooks form on the right. Click the switch to either 'Enabled' or 'Disabled', and click Done in the top right of the form to save your changes, otherwise click Cancel.
Comments
0 comments
Please sign in to leave a comment.